Quick update. As the year 2015 is behind me, so is the strict limit of 10 coin rings per year.
I desperately needed that year off to pursue other things. Which I did. And I am quite happy for doing. Now that we have been well launched in 2016. I am back at the hammer, and am more efficient than ever. I will be introducing new things as the year progresses as well I will again, be taking custom orders for coin rings.
I have up right now, custom orders for Morgan dollars, Half dollars and more. That can be found here at www.saintaugustinemint.com
I doubt I will be using O'Shea Coin Rings this year as a web address. But if I do, it will again link to the blog.
I am keeping it handmade as I have since I started. There will be no use of fancy presses, dies or 1 minute made rings. I am sure you all know that by now, that I do everything by hand. So, just to reassure you, YES. They will continue to be made by hand.
Questions go to: OSheaHandMade@Gmail.com
-R

Friday, January 22, 2016


Sunday, March 1, 2015
NOTICE
All previous posts have been taken offline and now are in the archives in PDF format.
You can reach me at
OSheaHandMade@Gmail.com
or visit the shops that carry my work.
www.SaintAugustineMint.com
thank you.
R
Monday, June 2, 2014
The Art Of Hand-Made Part 1 "Understanding"

I have been hand making double sided coin rings now for longer than I can count. I have made hundreds of rings. In fact, I could probably remember every single one of them if I thought about it hard enough. Each ring I made was special to me as I made it. I've never cranked out my rings in large amounts or for profit. That is something I think people often confuse me for, is a businessman running a business. I am not. I am a person, that constantly seeks challenge and exploration. I am a gold miner by trade. Back breaking hard laborious work. Certainly the extra income from ring making would put me in a better position financially if I was to go the business route with it. I don't do trade shows, events or local swap meets. In fact, I have never done a show of any kind. Its simply not what I am about. I know I make some nice pieces. I could make it a business and churn out rings like a mad thing if I wanted that. But. I have said it many times. I don't want this to be a business. The day its a business, is the day I don't care about it anymore. And I wanna care about it. Its opened many doors for me I would have never had the chance to explore. Its not about money. Parts of it are. Obviously. I have to keep it going. But. Its about what can I do next that is better than what I did last. And who can I make happy this time. Will I be lucky enough to sell my work to start a new project. Will I be so lucky as to make another wedding band for someone? That is always a big deal - making a wedding band. When I started this, I never thought I would reach a level to make wedding bands yet alone even see them sell. Its still an honor every time a piece sells. As it propels me along to the next project. And I hope to do many more rings for people. Because I invest myself into each piece. I work hard. I get frustrated. And then I feel a level of accomplishment once I get the piece completed, perfect and passed on. Each project is a little journey. A little exploration. No machine can match that. I don't care what the excuse is.
 Something people are leaving out of this craft as new ring makers spring up all around. Is the personal investment in it. Many come to me for advice. They always say the same thing, something very flattering, then they get to the point. They want to know how its done and then tell me not to worry, they are not going to be making them to sell. Then, they show up a week later, selling rings by the dozen. They didn't like my advice. So they took the easy route. And went for the machines that do the work for them. They see a hand-made ring sell for a well earned price, and figure they can have a machine do the work with out breaking a sweat and collect the rent as I call it. I feel it's tacky. Its cheap. Its a fine Scotch Whisky VS some cheap 12$ gut rot Whiskey. It's been ruining what the real coin artisans do, thanks to cheap profiteers producing rubbish. And people buying cheaply made rings they produce. But. People will spend what they wanna spend on whatever they want. And people are going to make these rings however they want. No stopping it. No point fighting it. I am here simply to tell you, that I am still making rings the same way I always have. No machines. All hand tools, always hand-made. And I will continue to as long as there is still interest in old fashioned hand-made artisan pieces. Pieces with energy. With life. Not some soulless mass produced copied piece those other guys did on their lathes and automated presses while watching it happen.
I am still here to teach those of you who are truly interested in making rings by hand. And to help motivate you. My way is traditional. But I am not, Amish about it.
People that want quality hand-made pieces from experience will visit me, or other ringers or coin artisans that remain true to the trench art revival styles who do their work by hand. Who do this because its what they do. And do it because they, like myself love to do it.
People that want quality hand-made pieces from experience will visit me, or other ringers or coin artisans that remain true to the trench art revival styles who do their work by hand. Who do this because its what they do. And do it because they, like myself love to do it.
 |
| Using a router bit to remove burs and file away the center hole. |

Anyway. This little precursor to the real post "creation" is a bit cranky, but the intent is to make it clear I am a by hand coin ringer. And I simply don't give a crap about pieces made by machines. They are two different worlds. I welcome you to mine. And hope you can end up teaching me a thing or two.
Visit me on Facebook, or Twitter @Ryanoshea36 and say hello. I enjoy talking rings just as much as I like making them.
In my next post The Art of Hand-Made, Part 2 "Creation". I will be going over how to make a coin ring. So be sure to subscribe, check back, or bookmark. The next post is the one most of you have been waiting for. And a glimpse into something even bigger.
The typical mediums I work with are Gold, Silver, CuproNickel and Bronze / Copper. Below are some examples of these. And what you to can use in your ring making. In my next post, I will cover Coin Alloy's. And what is best to use for beginners, and what the difference in Alloy Means. So stay tuned. For those of you following my posts. THANK YOU. Please keep at it! Share your work with me. And if you wish, I will post your hand-made pieces in my posts to share with others. Enjoy the pictures. For those interested in purchasing a ring, there are always some rings up for sale at OSheaCoinRings.com. But you can email me for a custom order here O'Shea Coin Rings, Order Email.
 |
| (GOLD) Classic "49er" ™US 10$ Gold Eagle Ring |
 |
| (SILVER) Classic "The Mighty Dollar Gamblers Ring" ™ Morgan Silver Dollar Coin Ring. |
 |
| (CuNi) Australian 50 Cents Copper Nickel Scalloped Rim |
 |
| (BRONZE) 1864 Nova Scotia Large Cent. Canada Pre Confederation. |
Below are a couple short videos showing a couple rings I completed this month. They are up for sale now on Etsy. Have a look. And only buy from me if you really want it.
This Silver Morgan Dollar, is about as American as you can get in a coin ring. It shouts the wild west, it shouts the USA, the mighty dollar and is the most popular coin ring I get asked for. I make them in many sizes. But have not made enough in larger sizes. So here is one for those with larger hands.
The Japanese Silver 50 Sen. I have a total of four of these over the years. And they are my favorite coin from Asia. This coin was made from a brilliant Uncirculated Grade coin that was not cheap to aquire. But worth it due to its stunning detail.
Below, is the wedding band you see up top of this post. It was made for a very nice couple as a wedding band. I thank them for the photo above. And wish them the best in their marriage.
"SupportHandMade"

Thanks
Saturday, February 22, 2014
How to Make Coin Rings: Tips and Tricks.
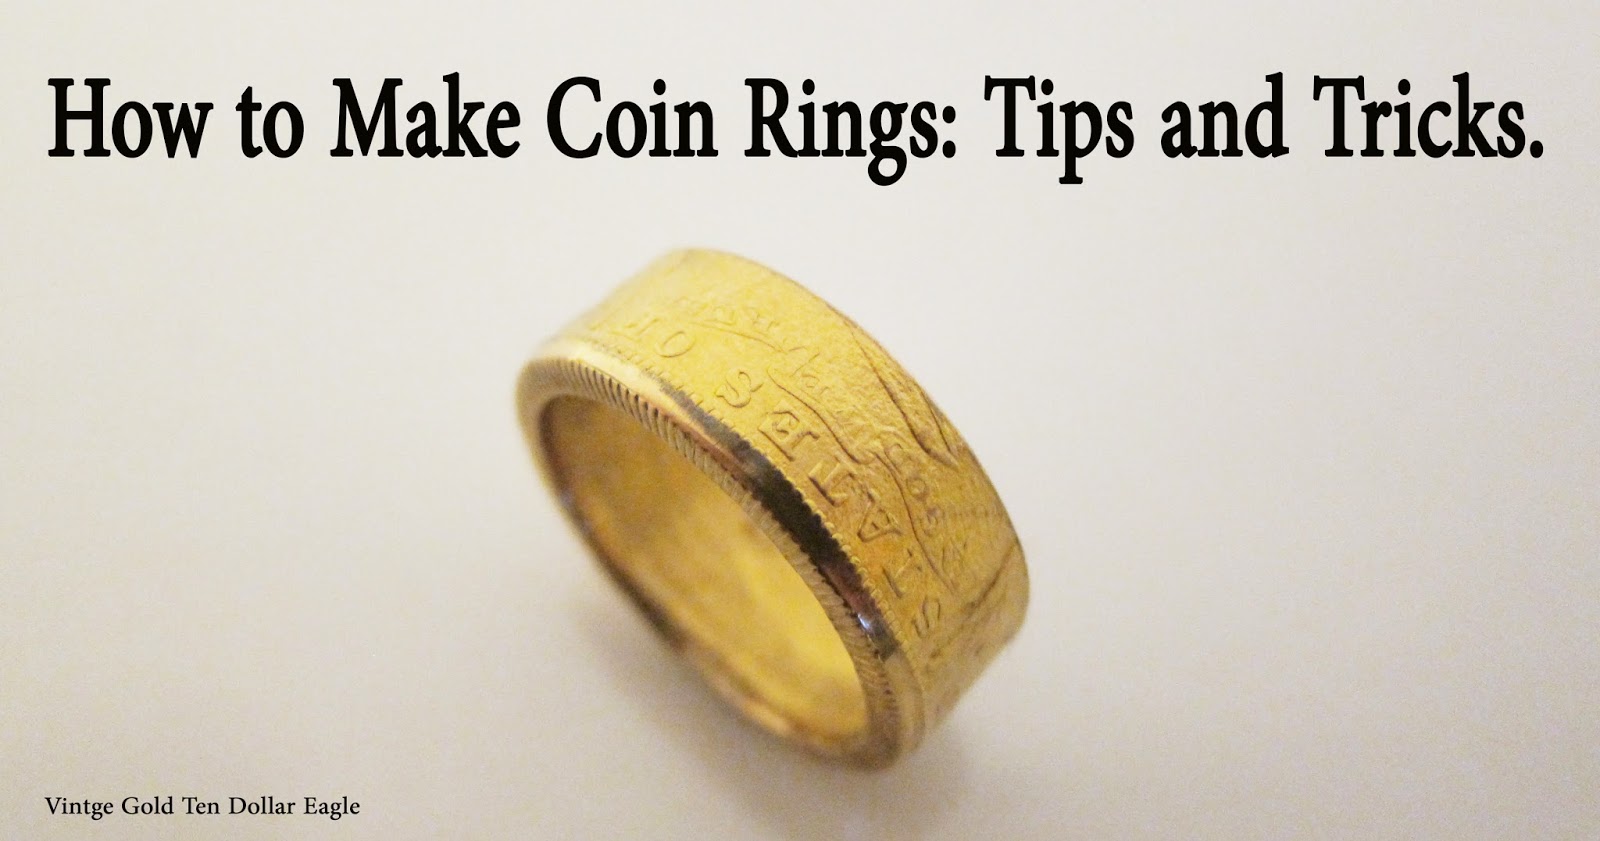
Anyway. Hope this helps. All the best! Please subscribe to the blog by entering your email to the left. Or, your questions can be sent to me directly at: osheacoinrings@yahoo.com
-Ryan O'Shea
 First, as I explain to many people starting out in this hobby a "perfectly centered hole" is not necessary. It just isn't. It can be slightly off. And can easily be corrected with the use of a round and flat file before and after the coin has been folded by filing the non factory side of your piece. Over the years I have watched many ringers come and go with different ways to center the hole in the coin. And youtube is full of these methods and even tools, so I understand why so many are confused about it. There is no one way to do it. There are many. My way, or ways are just simply that. My ways of doing it. But they work for me. And my pieces, I hope should reflect that I know a little bit about coin ring making. There are makers of a punch tool specifically made to punch a dead center hole in coins like half dollars, dollars ect if you want to spend 300$. I am not against these tools. They are brilliant. But as I have heard from many people. Nearly impossible to obtain. I figure with a tool like that, they are just swamped with orders. And like me. Have to turn the work away. Would I like to own one, sure. Am I willing to spend 300 dollars? No. Again. My method has worked for me for a very long time. And it will for you too. However, there are a lot of people who don't want to put in the work or discipline into hand made pieces. They want short cuts. They want fast results the easy way. But the fact is, when it comes to making a hand made artisan coin ring there are no short cuts. And its only as hard as you make it. These tips will show that it is actually quite easy with a little work. And you might just come up with an method that works so well, you could teach us all a thing or two.
The finished 1894 Newfoundland Coin Ring. Sz 9. For Sale on Etsy!
How To Find The Center In Your Coin:
As mentioned before. Your initial hole does not have to be perfectly centered. Only as centered as you can get it. Of course a perfectly centered hole is ideal. But with minimal tools at minimal cost, its more of a challenge, but not hard to do. I have tried many ways to do get my holes more perfectly centered. From use of calipers, templates and more recently the use of a centering tool made for finding the center of round flat objects. This tool has proven to be extremely useful and very inexpensive. And so that is what I am going to share here so you can use the same type of tool to locate the center of your coin no matter its size. And I highly suggest getting one like it.

Shown left is a Robert Larson Brand Circle Center Finder tool.
I picked this tool up from Jerry's for 4 dollars. And I have to admit. I don't know why I never gave it any thought until recently for use in my projects. Its brilliant. Easy to use. And it really does get you as close to dead center as you can get. I have used it on many coins with great success. The video below will demonstrate it for you. Combined with a circle template its a powerful combination of tools that are readily available at your local home improvement stores. Once your center is located. You should have greater success centering your hole no matter what tool you use. Drill, Die Punch or Jewelers saw. The use of calipers and a round file are also tools I suggest using as you can actually get a nearly perfect centered hole by measuring and filing the hole if it is off center. A good eye and rolling the coin in your finger tips against a flat colored back ground will show any wobble in the hole if it is off. Correct what you can. Because later in the process you will be making use of a flat file to finalize the last steps in getting a uniform band in your rings anyway.

The use of a round file to correct any unevenness in your center hole.
The use of the round file is an easy way to adjust any off center hole in your coin. With the use of calipers, file it out until it is as even as you can get it. Again. Does not have to be perfect. You will correct this after your fold by using a flat file by filing the non factory side of the coin until the band is uniform in shape. As shown below, I am in the process of filing the non factory side of this Australian florin evening out the band. It doesn't take much filing. The bonus to this method, is you will get the non factory side to be about as thick as the factory, or reeded side of the coin. This also helps make for comfortable band, as a ring band should be. Of course there is other steps involved. But I will get to that later.

Use of a center tool video
As explained above, this video simply shows how you would use your center tool to find the center and how great of a inexpensive tool it really is.
Wrapping your mandrel in leather video
I am asked this so often its amazing. So somewhere along the line I guess I didn't explain it and many of you became confused. I apologize. Its really a simple method. And the idea is to prevent the inside details of the coin from marring from the pressure created between the mandrel and the mallet during transformation. Leather has many great uses in making coin rings. And we will tackle that in future posts. For now. See the below video for a simple explanation of how to wrap your mandrel.
Watch On Youtube
TIP: Checking For Hairline Cracks in your work.
As you work your piece, I think its vital you check for any hairline cracks in your coin to prevent the coin from splitting in half. I do this by use of a loop to see if any cracks are evident in the coin before use and as I am transforming the piece into a ring. If a hairline crack becomes to big, and goes unnoticed your ring is surely to crack and break. This can be fixed if caught early. This is one part of the reason I use only high grade coins. And am extremely picky the older the coin. If you are coin shopping, avoid buying coins with dents or dings or anything that tells you the coin has been damaged. The video below is an example of how I periodically check my coins for cracking as I work them. I can't tell you how many times identifying a crack before it really opened up and split saved my pieces. This was a hard lesson learned early on. I've cracked a few coins over the years, and its an awful feeling. So I am posting this tip here so you will hopefully never have to go through that. And I will elaborate more on it in the future. For now. Keep an eye on the small details.
Watch On Youtube
BE SURE TO CHECK MY PREVIOUS POSTS FOR MORE INFORMATION ON COIN RING MAKING.
Tools of hand made coin ring making

Saturday, November 2, 2013
The Tools Of Hand-Made Coin Ring Making.
VISIT MY WEBSITE TO PURCHASE RINGS www.SaintAugustineMint.com

When you are buying from a true artisan / maker, you are buying more
than just an object. You are buying hundreds of hours of hard work, failures and
experimentation. You are buying months and years of frustration and the moments of
happiness. You are not buying just a thing. You are buying a piece of
heart, soul and a moment in someones life. And most importantly, you are
buying the artisan more time to do something they are passionate about.
Pictured above, is a British India Victorian One Rupee Coin Ring, created as a wedding band in September 2013. It was requested to be made in true to form fashion. That, being hand-made. No machines. As a coin artisan, I do all my work by hand. No castings, or fancy ring making machines or what I call "Chinese Manufacture". As coin ringing has grown in popularity, fewer people are buying pieces, but wanting to create their own. This of course is a good thing. However, more and more ridiculous tools and lazy methods are popping up to make this art form seem"easier". The truth is, there is no easy way to do it unless a machine is doing the work for you. And that is not what I consider artisan jewelry. So, before you spend your money on some silly tool you saw on youtube, or on some silly method you read about. Understand, that what I teach, and how I create my work is traditional and you don't need any of those special tools created especially for coin ring making. I don't use them. All the tools I use are readily available, have been around for decades and are easy to buy for a low cost. In this post. We are going to go over the basic tools. Tools can chose from that won't cost you an arm and leg then decide the hobby isn't for you. Its best to give it a go first. And then decide if you want to continue. And, if you want to make pieces you are proud of. Pieces that are a part of you. You are going to first have to challenge yourself to do it.


Lets take a look at some of the tools I use in my shop. And create a list so you know what you will need to get started. Now is probably as good a time as any to inform you, I have been making these rings for 12 + years. So I have some experience under my belt. And your results won't be the same as mine just yet. But if you take my advice, and go from there. You will get great results. I have seen it over and over. With an occasional grouchy nutter that just can't figure it out, and blames me as being deceptive in my blog. It makes me laugh. Simply put. I don't have to put anything up here. And I don't have any deceiving to do. Nutters are nuts. What can I say. Some people just simply lost the plot. And once in a while, I get hit with it. That's life. Point is. I don't want nutters writing me with their weird complaints or nasty gob. So. haha. If you're unstable. Jog on.
So, you're here. Lets get to the list. The most basic tools you will need is a round ring mandrel, Raw Hide Mallet or Nylon mallet. I highly prefer raw hide. So, that is what I suggest. However, your local shop may not carry them. So Nylon is fine. But I do recommend Raw Hide. 4 Oz, to 9 oz is best depending on the size of ring you are working with. Larger coins, heavier mallet. smaller, lesser weight. You're going to need a tool to put a center hole in your coin. And there are several options. A drill, a die punch set, or, if you want to go methodical. I recommend a jewelers saw to cut your center hole. We will get into depth on the sawing method more later and in future posts. You will need a calipers. A round file and flat file. 600 grit sand paper and a way to anneal your coins by use of a torch and a few more items that will be handy. First lets start with.
MANDRELS:

This is the most basic tool you will need in coin ring making. I have four, for different sizes of rings. Stepped. Smooth. Small. And a wooden mandrel for gold. But for you, you only need one or two depending on budget. On the top left is your basic grooved steel mandrel. The grooves are a ring size chart which can be handy. So you know how far to stretch your piece for size. On the right, is a stepped mandrel. Each step is a size. The handy thing with a step mandrel, is you can more easily get your ring band uniform in shape. And more accurately size it. But this is really its only use in coin ringing. The standard mandrel is a must have. Note: I prefer the smooth steel mandrels. The grooves can mar your coin and its sizing is not always accurate. And I always wrap my mandrel in leather to prevent any marring inside the band even on the smooth mandrels. So whatever way you go. Use leather on your mandrel as much as possible.
MALLETS:

The second and evenly important tool is a non marring mallet. Since we are working with coins, and the design of which being the key to its appearance as a ring. We don't want to loose any details of the coins strike pattern. There are two very good options as seen above. The rawhide is a bit more costly for a quality long lasting one. And they come in a variety of face sizes and weight good for smaller coins and larger coins. Rawhide even has the option of being lead filled which are excellent for working larger, thicker coins like silver dollars as seen below. Or coins made of hard copper nickel, nickel and steel. The Nylon, or plastic mallet is a cheaper way to go. They don't last as long. But are easy to replace for an average cost of 12-15$. But do you want to constantly replace them? There are also different varieties and sizes as well. But not like the raw hide mallets. Something you can explore in your spare time on the internet is looking at mallets. In the end, it will really come down to which mallet you prefer to work with. If you take this craft seriously, you will end up with them all anyway. I did.
 |
| 1881 Morgan Dollar "The Gamblers Ring" Size 11. Done with Lead filled Raw Hide Mallet. The only way to go is Lead Filled on these large Silver Coins. |
 |
| This wedding band had to be done with a leather Raw Hide Mallet, being it is copper nickel alloy. Do not confuse CuNi with Copper Clad. CuNi is a very HARD alloy, as Clad is just copper with an other layer of nickel alloy plating, or other cheap metals. |
CENTER HOLE:
OPTIONS AND THE TOOLS.

 Now that you have a coin selected. The first step, or steps depends on how you plan to go about cutting a centered hole into your coin. The tools shown above are the two most common. If you plan to use a drill. Be warned that the bigger the drill bit, the better the chances the drill bit will bounce and scratch your coin. So be very careful using just a drill. If you have a drill press. Then get a good set up to hold the coin firmly. And always pilot hole it first. The second method is a die punch, with clear top so you can see where your coin is aligned. If using a punch. You will need to anneal your coin first. I've covered the annealing process in previous posts. So I suggest you learn it before you go and melt a coin. The torch shown right, is a cheap 12-15$ torch. It works good for this. I suggest you pick one up if you are using a die set. Which, most of you will. 95% of the emails I get. You are all using die punches. So I will get into better depth on that in the future. I have some class methods to using those. I used them for a few years until I couldn't stand them and figured out some great ways to make them work. With that said. back to the torch. You are going to need one anyway, so grab one. Simply put. The coins must be annealed to be worked. A cold fold is totally doable. I've done many that way. However. They are far more prone to cracking. And annealing helps prevent that on a molecular level, by unbinding the molecules long enough that the coin becomes soft and malleable. And soft means easier on the arm. You will want a pickle acid for annealing. The brand I most commonly use is Sparex. What it does, is remove fire stain, scale and crap off the coin. We will cover sparex down below.
HAND CUTTING A CENTER HOLE:

Hand cutting a center hole is my preferred method. Die punches can create hairline fractures in your coins. Especially older coins or coins with higher relief details. Hand cutting allows me to cut the hole where I want it and gives me complete control over its size and center. And the bonus is it does not damage the coin like a 6 ton hammer blow would do. If you want to go this route, it is a bit more tedious. Needs some practice. But worth it in my opinion. You will need a drill, with small drill bit. An Adjustable Jewelers saw, as seen top left. #0 is my preferred choice of cutting blade.

The Circle Center Finder Tool is a must have tool in my opinion that will help you locate the center of your coin no matter its size. With the use of a circle template, its a cheap and powerful set of tools. The one shown here is 4 dollars from Jerry's. And I am sure any home improvement store will carry one like it. Though, calipers can be just as useful and give you just as good results using a little math. Or, just simply eyeballing it. That I will definitely cover in detail down the road so you can see what exactly I am talking about.
CALIPERS:

These next two tools are important tools you will use a lot. Calipers are how I measure my center hole, and draw a dead center circle on my coins. If they come out a bit off. I then use the same tool to measure the distance from the smallest point. Created a new center guide and file away with a round file to make it even. I've been asked so many times how to get a perfectly centered hole as if it matters when you first put the hole into the center of the coin. A perfectly centered hole by use of drill, saw or punch does not matter. So stop worrying about it. The truth is. Dead center just makes it easier. If it is slightly off. Its not a big deal. Its fixable down the road in the transformation.The key is, just get it as close to center as you can. Measure, mark and file it into a nearly perfect center hole. There are a wide variety of calipers. From cheap plastic 5$ versions as seen top left, to the 15-20$ digital style right. A high end precision caliper really isn't necessary. But if you already own one. Great. I will mention, in my experience while cheap calipers work fine. A set of locking calipers is best. I see some come up on ebay every now and then for dirt cheap. And they are a steal. So look around for a locking set. If its under 15$. Grab it.
ROUND AND FLAT FILES:

RING SIZING TOOLS:

A very old ring sizing tool is the Rathburn ring stretcher. These work great for helping size and making your ring uniform in shape. And guess what? They are cheap to buy. Remember to anneal your coin ring before you place it on this tool. And like the use of a mandrel, I highly suggest wrapping leather around this tool as it is extremely prone to marring. Place your ring non factory side down, leaving the factory side over the lip of the step. I prefer to use a dead blow hammer on these tools when I use one. That is basically a mallet full of beans or lead blobs.

As mentioned earlier, sizing on a steel mandrel isn't very accurate. So I suggest buying a plastic ring sizer stick, and set of ring size loops. Shown above are two very common sizing sticks. One is standard US sizes, and the other is UK and US sizes. Your Calipers can determine the inside MM. And printing out a world ring size comparison chart is free. Grab one and post it on your wall near your work bench. I'll provide a copy of one here below.

SPAREX AND PICKLING AFTER ANNEALING

Sparex is great for removing any fire stain from annealing. You will use this pickle every time you anneal your coins as they work harden. Heat your piece, and quench it in a bath of water with sparex. Do not use a metal bowl, or any kind of metal as sparex will eventually eat it away. A ceramic bowl, or crock pot works great. A heated solution of sparex works better when warm. Use copper jewelry tongs, or stainless steel. Keep a small bath of water mixed with baking soda nearby to neutralize the acid. Or just water. Sparex is not something you want on your cloths, or steel tools. If left it can eat holes in cloths, cloths and your tools. If working with a pickle, you will notice a dunk into sparex will turn your silver a flat white color. A brazed look. Steel wool, polish cloth or a large eraser will remove this white color. I actually use the sparex in my fire finish designs as it creates a great satin like finish in the low relief fields on polished rings. Some experimenting and you will come up with some neat finishes to your rings.
NOTE: If working with brass. Let your annealed piece sit on a piece of steel to cool down before you let it sit in your pickle solution to remove the fire stain.
Finishes to your rings.
 |
| Patina Finish. This is done many ways. the most common is use of Liver Of Sulphur. |
 |
| 1871 Silver UK Shilling. Satin / Fire Finish |
Well, there you have it. The Basic tools of hand-made coin ring making. I hope this post was helpful. And I wish you the best of luck in your coin ring making. Remember, hard work pays off. You will not only feel good about having crafted a ring by hand. But you've put a piece of yourself into each of these pieces. No machine can ever do what the hands of an artisan can do. The Picasso's and Van Gogh's didn't use a machine to paint. Great singers don't use auto tune. For me, this is about creating pieces of art. Pieces I am proud to share with others. Hopefully. My photos give you a little inspiration. I am always excited when I make a nice piece.
Good luck. Subscribe if you wish to be updated on the next post. I post these for you guys in my free time. So I hope they help.
Join me on FACEBOOK - No Nut bars allowed.
All ring images © O'Shea Coin Rings 2012, 2013.
This article is published and © 11/2/13 O'Shea Coin Rings. And it is not under the public domain.
Wednesday, April 24, 2013
Morgan Dollar Coin Ring 1881

1881 S Silver Morgan Dollar Coin Ring.
Sized at 11. Tire Design. Total weight of 24 grams.
This piece is sold. But if you want one like it, contact me. Estimated Price is 220$
Working with larger coin can be a difficult task. Its why I tend to stay away from larger coins. However I've been wanting to challenge myself. I've found the use of a drill or punch die set can be frustrating. And in my opinion, is just not an option for larger gauged coins. A large drill bit can jump around and scratch your coin, holding it in place can be a nightmare and your hole can be off center. So the other option is you might as well go with a die set. However, coins in die sets have a tendency to move as the hammer strikes its blow and your off center anyway. The biggest trouble with die sets is, they can crack the coin. Cracks so small you don't notice them until you start folding the coin. Besides. A large coin like a Morgan Dollar, doesn't really fit in a die punch. 
Instead, I use a jewelers saw with a #4 or #6 ott blade to make
my hole. The first step is to find my center and then draw a circle
template in the center of the coin. Keeping my drill handy. I use a
small drill bit, rather than the big one, to make a small hole in the
top of the center circle template. I thread my saw blade through that.
And from there I cut out my center. This not only helps get a good
centered hole. But it greatly reduces any marring or scratches that a
large drill bit or die punch may cause. And makes a better quality
Morgan Dollar Ring possible.

Once you have the center hole finished. You can proceed to make your coin ring as you normally would. If you have questions or need help. Feel free to ask them and I will post them in the next how to post.


Thanks for stopping by. Good luck with your ring making!
NOTE: THE PHOTO OF THE 1881 MORGAN DOLLAR COIN RING, I RYAN O'SHEA MADE HAS BEEN SUBJECT TO A RIDICULOUS AMOUNT OF THEFT FOR USE IN OTHER SO CALLED COIN RING MAKERS LISTINGS. IF YOU SEE MY WORK, ADVERTISED ON ANOTHER SELLERS SITE. I SUGGEST YOU TURN AROUND AND FIND AN HONEST RING MAKER.
Subscribe to:
Posts (Atom)